
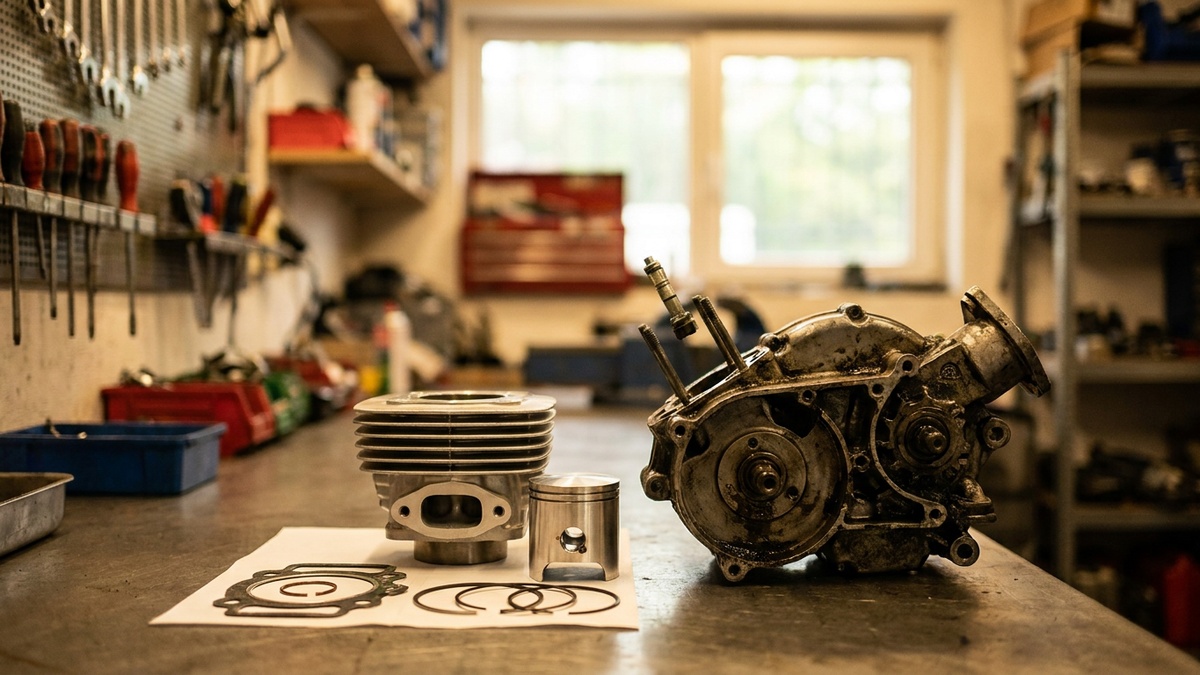
Most riders probably started out on two wheels with a simple, lightweight motorcycle, or maybe even a moped. In Soviet times, these were Karpaty, Riga and Verkhovyna mopeds with a simple two-stroke engine of up to 50cc. But after riding one of these for a while, you always wanted more speed, more power, more pep. And so it began: engine tuning, experimenting with sprockets, carburetor upgrades and so on. In the end, it all came down to fitting a Minsk engine if it was, say, a Verkhovyna or a Karpaty. Or simply buying a motorcycle. Today's owners of Chinese mopeds like the Delta and Alpha also want more engine power from their mopeds.
The engines on these mopeds are four-stroke, and at 50cc they produce less power than two-strokes. That's why these mopeds rarely go faster than 60 km/h, and why many owners want to increase the engine displacement. Fortunately, as they say, there's plenty of room for imagination here. There are five displacement options for this engine: 50, 72, 90, 100 and 110cc. Obviously, 50cc isn't an option, which leaves 72, 90, 100 and 110cc. In terms of cost, it makes the most sense to go for 72cc or straight to 110cc. Why?
Because 72cc can be fitted without fully taking the engine apart: you only replace the cylinder and piston group with the same one in a bigger diameter, namely 47 mm. The cylinder head and the timing gear don't need to be changed. But once you've got it apart, it makes sense to lap the valves and replace the valve stem seals. Experience shows that people most often move from 72cc to 110cc. This upgrade significantly increases power and, if set up correctly, even engine life, but more on that a little later. So, let's build a 110cc. Note right away that this conversion requires a complete engine teardown, so many people decide to ride the old engine until it's worn out, or "finish it off", simply so as not to throw away old parts. And when the engine needs repair, they get on with the upgrade.
Parts
- Active crankshaft (long-stroke)
- Complete 110cc cylinder (for the Delta or Active)
- 110cc engine gasket set
- Active timing chain (it's a good idea to replace the rollers too)
- Active cylinder studs (they're 20 mm longer; you need at least 2 — the right-hand ones in the direction of travel)
- Engine oil seal kit (any will do, either for the Active or for the Delta)
- 4T oil, 1 L
Once the engine is running, you may need to replace the main jet with one from the Active, or better still, fit the whole carburetor from an Active or a 110cc Delta/Alpha.
Tools
- Socket set with ratchets
- Rotor puller. If the rotor has never been removed before, don't even try to get it off with screwdrivers
- Special wrench for the clutch nut (you can use a blunt chisel instead)
- Container for draining the oil
- Sealant
- Rags
- Gasoline, kerosene or diesel and brushes for cleaning the engine parts
Engine disassembly
Once you've got everything you need, let's get to work. Put the moped on its center stand. First, place the container underneath and undo the oil drain bolt — it's better if the engine is warm. While the oil drains, disconnect the clutch cable and unhook the springs of the brake pedal and the brake light switch. Undo the two muffler mounting nuts and lower the muffler; there's no need to remove it completely. That's it for the right side for now. Move over to the left. Undo the two bolts holding the carburetor intake pipe to the head, pull the hose off the fuel tap and move the carburetor aside together with the intake pipe and cable. Next, remove the left-hand covers: the big one together with the stator, and the small one. Let the chain drop down after first undoing the two small bolts of the retaining plate on the front sprocket and removing the sprocket. Now you can take away the oil container and screw the drain bolt back in. From underneath, undo the four bolts holding the footrests and the side stand to the engine, and remove them.
Now nothing is stopping you from taking the engine off the frame. Undo the two nuts on the mounting bolts and pull out first the lower bolt, then the upper one, holding the engine so that it doesn't fall. Take the engine off and put it on the floor or on a low table. Undo the bolts on the right-hand cover and remove it. Be careful not to lose the small bushing with the spring — it sits in the release bearing bushing. Disassemble the clutch. You need to undo the four small bolts on the square cover. They're tightened hard at the factory, so it's easy to strip the heads — they take a Phillips screwdriver. If you feel it takes too much force, take a small chisel or screwdriver and tap the bolts on the end, as if turning them loose. It's best to fit new ones afterwards. Done. Now you can see the central clutch nut. It looks like a washer with four slots in it. If you don't have the right wrench, use a blunt chisel and a hammer.
Alternate between the slots so as not to damage them. Once it's off, remove the entire clutch together with the drive gear. Lay everything out so you don't mix things up later. For example, the thrust washer under the clutch goes on with its wide side facing out. Next, remove the circlip and the large driven gear from the shaft. Now remove the rotor from the crankshaft using the puller. To lock the crankshaft, find top dead center (TDC) at the end of the compression stroke, so that the valves are closed, and insert a small tommy bar or a sturdy screwdriver into the spark plug hole.
Screw the puller onto the rotor hub and, tapping it with a hammer, tighten the bolt until the rotor comes off. Remove the starter sprocket circlip and take off the whole mechanism: the starter sprocket, the starter chain and the bendix (one-way clutch). Undo the two bolts and remove the plate with the oil seal. Undo the four cylinder head nuts and the one bolt that holds the head to the cylinder. On the right-hand side cover of the head, unscrew and pull out the long bolt, and on the left, remove the round chrome cover. Behind it is the camshaft sprocket. Undo the three bolts on the camshaft sprocket with a 9 mm socket and remove the chain together with the sprocket from the camshaft. Remove the head. If you're not planning to repair it, set it aside.
Now the cylinder. On the left side of the cylinder, undo the bolt with a 10 mm wrench. The timing chain guide roller turns on it. Pull that out too. Also on the left, undo the last bolt holding the cylinder to the crankcase. Unscrew the cylinder studs — you can do just the two on the left. That's where we'll later screw in the studs from the Active. Now you can undo the crankcase bolts. Make sure you undo every one of them — some may be hidden under dirt. Otherwise, if you use force, you can break the crankcase. The halves come apart without effort, and the crankshaft sits in its seats almost freely — there's no need to heat the crankcase, knock the crankshaft out and so on. Just take out one crankshaft and put in the other. But before installation and assembly, it would be good to wash everything in gasoline or something similar.
Assembly and setup
Reassembly is done in reverse order. But there are a few important points to keep in mind. Be sure to put the dowel pins back in place in the crankcase halves, cylinder, head, and clutch and stator covers if they've fallen out. It's best not to replace the gasket between the crankcase halves with sealant, but on the clutch cover you can coat the gasket with sealant on both sides. By the way, it won't hurt to check the condition of the clutch plates. With a bigger piston kit, the load on the clutch increases, and if the plates are worn, it will slip. It's better to replace the plates right away — they cost next to nothing. Before installing the head, it's best to set the piston at TDC right away so you don't have to find it by the marks later.
Once the engine is running and you've taken it for a test ride, you'll find the gears are too short if you still have the stock 14 — 41 sprockets. Experience shows that the engine performs quite well with taller ratios, for example 14 — 39, 16 — 41, 16 — 39, and even with 16 — 36 it kept decent acceleration and fuel economy. You can also set the idle speed a bit lower. Some even set it to 800 rpm, and the engine runs steadily. After the break-in, put some load on the engine and ride a few kilometers at full throttle. Stop and take out the spark plug. Judge the mixture by its color. If the spark plug is gray or light brown, fit a jet from the Active or from a 110cc Delta or Alpha engine. If the plug is brick-colored or dark brown, the mixture is just right. That's it, the job's done — now you can enjoy good acceleration and a nice sound. Good luck, everyone!